
How to Make Grazing Cups for Beginners
Introduction
Welcome to the world of grazing cups, a creative and delightful way to serve snacks at any gathering or party. Grazing cups are not only visually appealing but also incredibly easy to assemble, making them a perfect choice for beginners looking to impress their guests with a unique culinary experience. In this guide, we will explore various grazing cup ideas that are fun, beautiful, and sure to be a hit at your next event.
Whether you’re hosting a birthday party, bridal shower, or simply having friends over for a casual get-together, grazing cups offer a versatile and hassle-free option for serving snacks. Let’s dive into the world of grazing cups and discover how you can create these individual snack cups that your guests will love.
Get ready to unleash your creativity and elevate your hosting game with these simple yet elegant grazing cup ideas that are guaranteed to make a lasting impression on your guests.
So, roll up your sleeves and let’s embark on this flavorful journey of crafting grazing cups that are as aesthetically pleasing as they are delicious.
Materials/Tools Required
Before you begin creating your grazing cups, gather the following materials and tools:
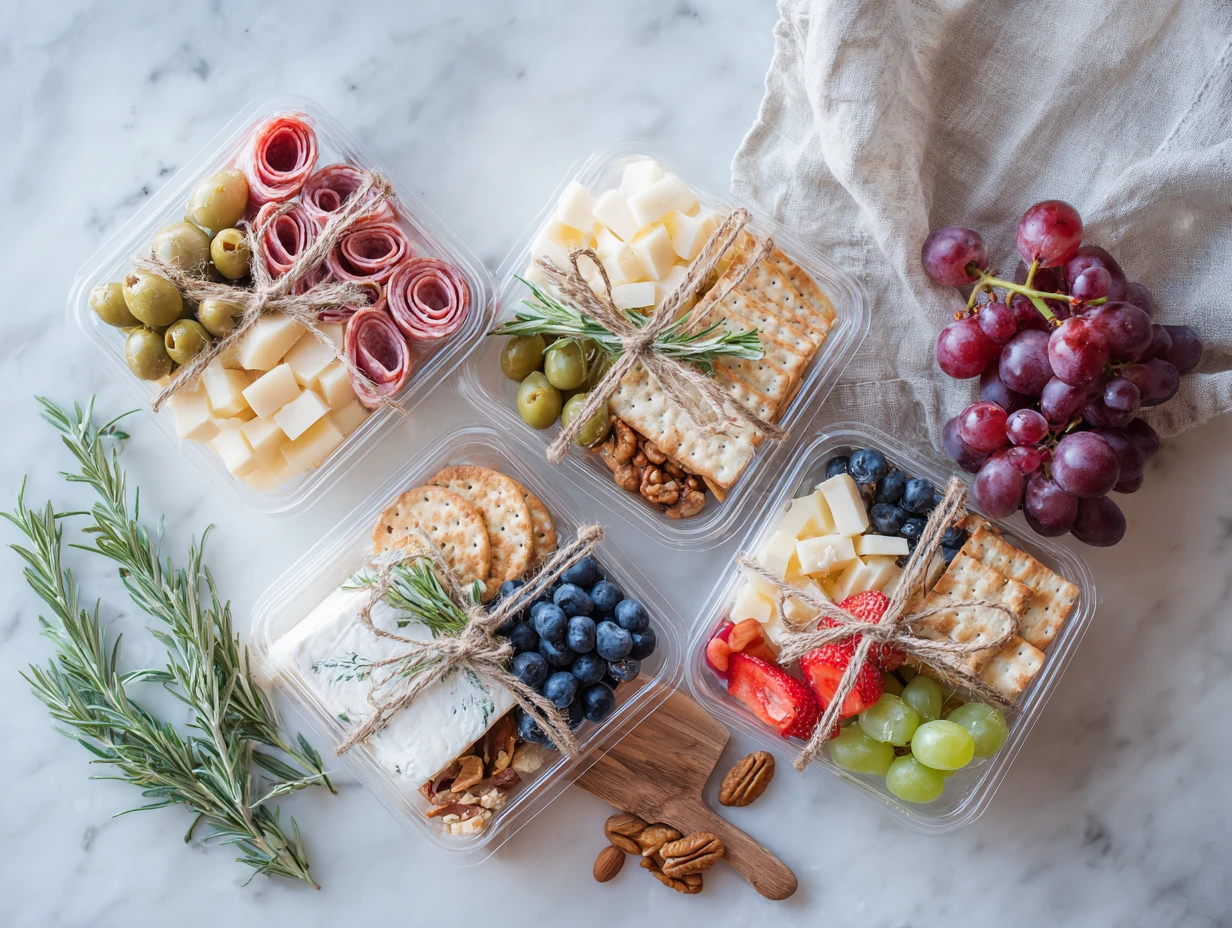
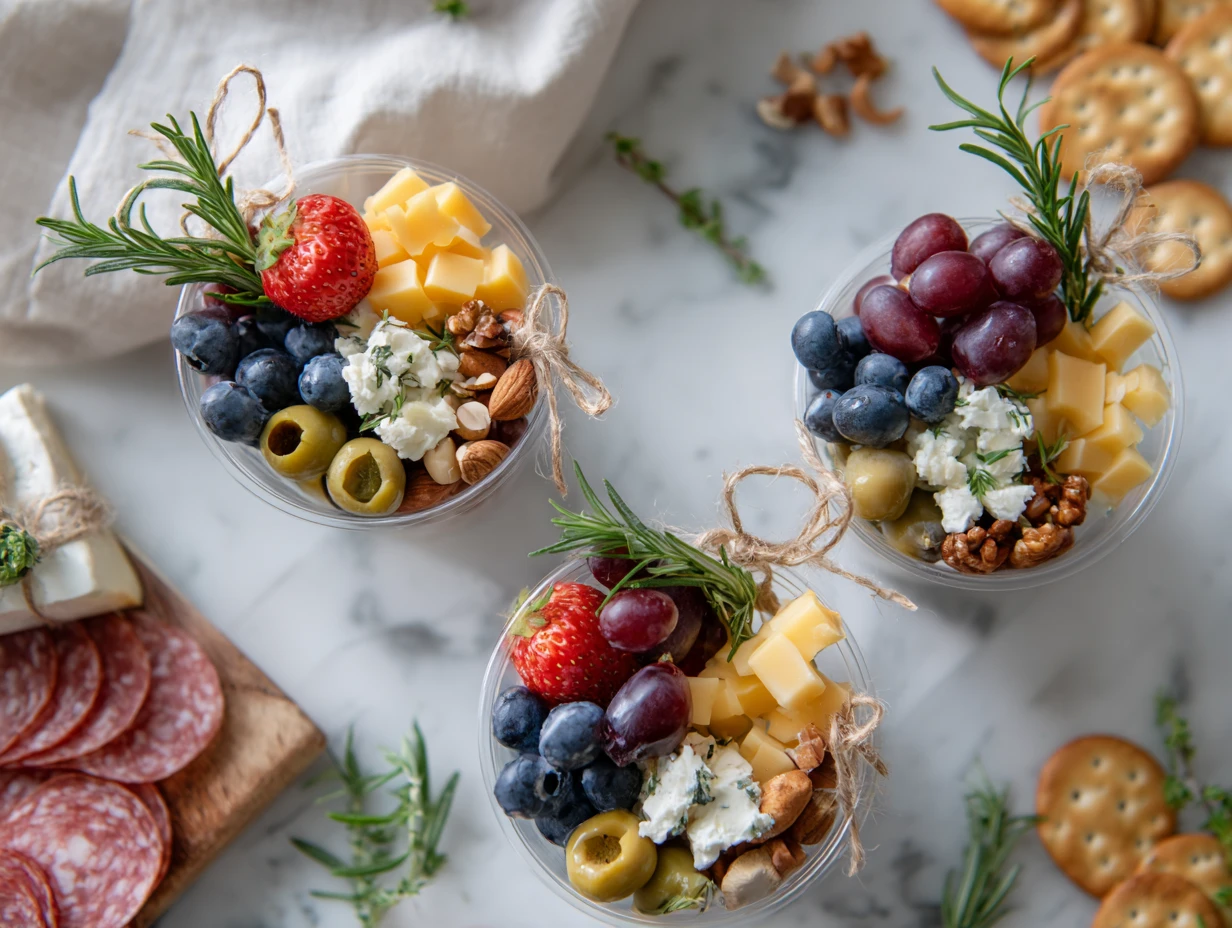
– Clear plastic cups or small glass jars
– Assorted snacks such as nuts, fruits, cheeses, and crackers
– Small serving spoons or picks
– Decorative elements like fresh herbs or edible flowers (optional)
Once you have all your materials ready, you’re all set to start assembling your grazing cups.
Remember, the beauty of grazing cups lies in their customizability, so feel free to mix and match ingredients based on your preferences and dietary restrictions.
Now, let’s move on to the exciting part—creating your very own grazing cups!
Step-by-Step Instructions
To assemble your grazing cups, follow these simple steps:
1. Start by placing a small layer of one type of snack at the bottom of each cup.
2. Continue layering different snacks to create an attractive and diverse display of flavors and textures.
3. Use small serving spoons or picks to make it easy for guests to enjoy the snacks without making a mess.
4. Add decorative elements such as fresh herbs or edible flowers to enhance the visual appeal of your grazing cups.
5. Arrange the cups on a serving platter or board for a stunning presentation that will wow your guests.
Feel free to experiment with different combinations of snacks and decorations to create unique grazing cups that reflect your personal style and taste.
Now that you’ve mastered the art of crafting grazing cups, let’s explore some creative variations and alternative approaches to take your snack game to the next level.
Variations/Alternative Approaches
Looking to add a twist to your grazing cups? Here are some creative ideas to inspire you:
– Mini Grazing Boards: Instead of individual cups, create mini grazing boards using wooden platters or slate boards for a rustic and communal snacking experience.
– Dessert Grazing Cups: Sweeten things up by filling your cups with decadent treats like chocolate-covered fruits, mini pastries, and candies for a dessert grazing experience.
– Theme-Based Grazing Cups: Tailor your grazing cups to fit the theme of your event, whether it’s a tropical luau, a Mediterranean feast, or a holiday celebration.
– DIY Grazing Cup Bar: Set up a DIY grazing cup bar at your party and let guests customize their own cups with their favorite snacks and toppings.
By exploring these alternative approaches, you can add a fun and personalized touch to your grazing cups that will leave a lasting impression on your guests.
Now, let’s discuss some common mistakes to avoid when creating grazing cups to ensure a seamless and successful snacking experience.
Common Mistakes to Avoid
When making grazing cups, be mindful of the following common mistakes:
– Overcrowding: Avoid overfilling the cups with snacks, as this can make it difficult for guests to pick and choose their favorites.
– Lack of Variety: Ensure you include a diverse selection of snacks to cater to different tastes and dietary preferences among your guests.
– Neglecting Presentation: Pay attention to the visual appeal of your grazing cups by arranging the snacks in an organized and aesthetically pleasing manner.
– Forgetting Labels: If you’re serving grazing cups with allergen-specific snacks, be sure to label each cup to help guests make informed choices.
By avoiding these common pitfalls, you can elevate your grazing cup game and create a memorable snacking experience for your guests.
Before we conclude, here are some additional tips and tricks to enhance your grazing cup creations and take them to the next level.
Tips and Tricks
Here are some expert tips to help you perfect your grazing cups:
– Pre-cut Ingredients: Save time by pre-cutting fruits, cheeses, and other snacks before assembling your grazing cups.
– Balance Flavors: Aim for a balance of sweet, savory, crunchy, and creamy elements in your grazing cups to delight your guests’ taste buds.
– Play with Colors: Create visually appealing grazing cups by incorporating a variety of colorful ingredients that pop against the clear cups.
– Keep it Fresh: Opt for fresh and seasonal ingredients to ensure your grazing cups are as delicious as they are visually appealing.
By incorporating these tips and tricks into your grazing cup-making process, you can create stunning and delectable snack displays that will leave a lasting impression on your guests.
As you continue to experiment and refine your grazing cup creations, don’t forget to have fun and let your creativity shine through in every cup you assemble.
Conclusion
Congratulations! You’ve now learned how to make grazing cups for beginners and discovered a world of creativity and flavor that awaits you in the realm of snack presentation.
Whether you’re hosting a small gathering or a large event, grazing cups offer a versatile and visually stunning way to serve snacks that will impress your guests and elevate your hosting game.
So, gather your materials, unleash your creativity, and start crafting your own grazing cups to add a touch of elegance and fun to your next party.
Remember, the beauty of grazing cups lies in their customizability, so feel free to experiment, innovate, and create grazing cup masterpieces that reflect your unique style and taste.
Thank you for joining us on this flavorful journey of crafting grazing cups. Cheers to many more delicious and delightful snacking experiences ahead!
FAQs
Q: Can I prepare grazing cups in advance?
A: Yes, you can prepare grazing cups a few hours before your event and store them in the refrigerator. Just be sure to cover them with plastic wrap to keep the snacks fresh.
Q: How many grazing cups should I make per guest?
A: Plan on making 2-3 grazing cups per guest to ensure everyone has plenty of snacks to enjoy throughout the event.
Q: Can I customize grazing cups for dietary restrictions?
A: Absolutely! Feel free to tailor your grazing cups to accommodate dietary restrictions by offering a variety of snacks that cater to different needs.
Q: How long can grazing cups sit out at a party?
A: Grazing cups can sit out at room temperature for up to 2 hours. After that, it’s best to refrigerate any remaining cups to ensure food safety.